How To Design Save The Date Cards Using Downloadable Assets From Creative Market
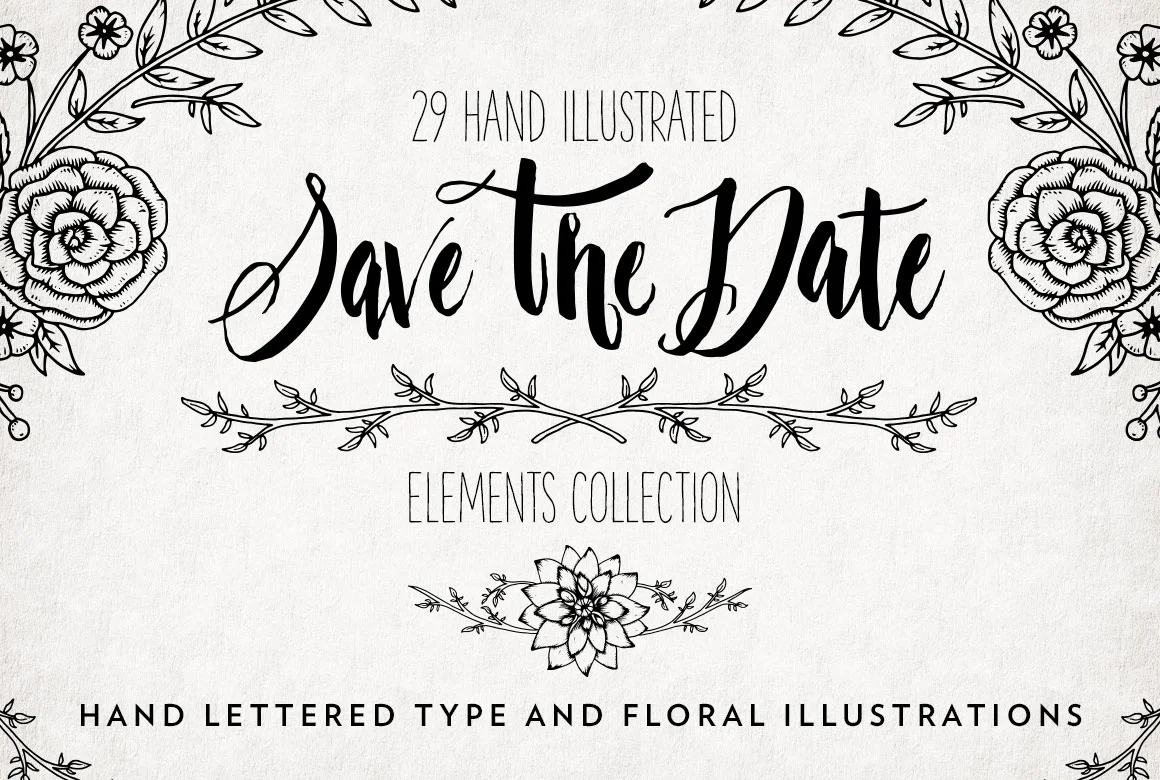
Learn how to design a Save The Date using downloadable assets from creative market featuring my product "Hand Illustrated Save The Date Overlays".
I decided to put together this helpful demo guide for anyone that purchases my downloadable product. Thanks for supporting my art and incorporating it into your special day.
After you receive the download and open the folder, Open Photoshop and let's begin.
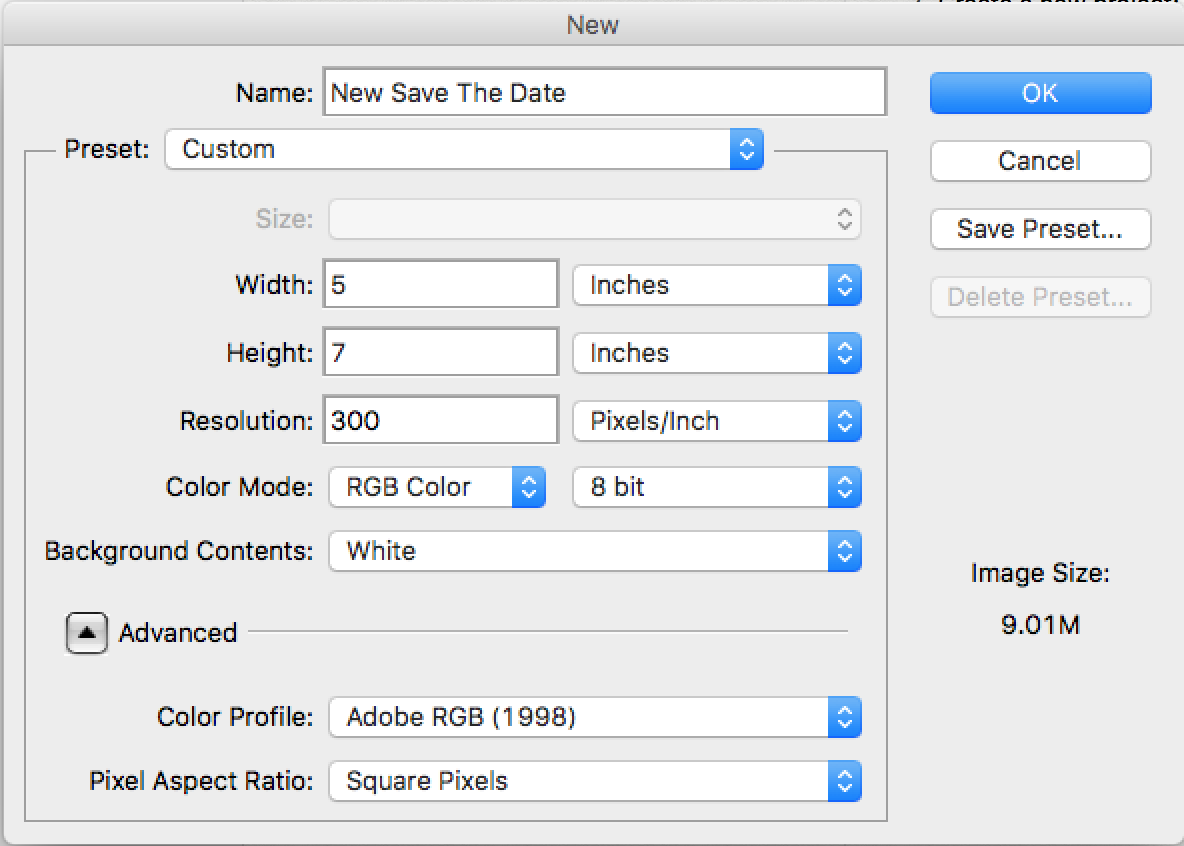
Step 1 - Create A New Project: Create a New project and enter the dimensions depending on the size you'd like your Save The Dates printed. I decided to use 5x7" for this demo.
- Quick Note: Typically, you'll need to add a bleed to your size. Usually the bleed adds .25" to the width and length, but check with the print shop you'll be printing these at. Ask or check online to see what bleed size the file will need. Sometimes, the online print shops supply files for you that have bleeds already to go. I like to use JakPrints & MPix.
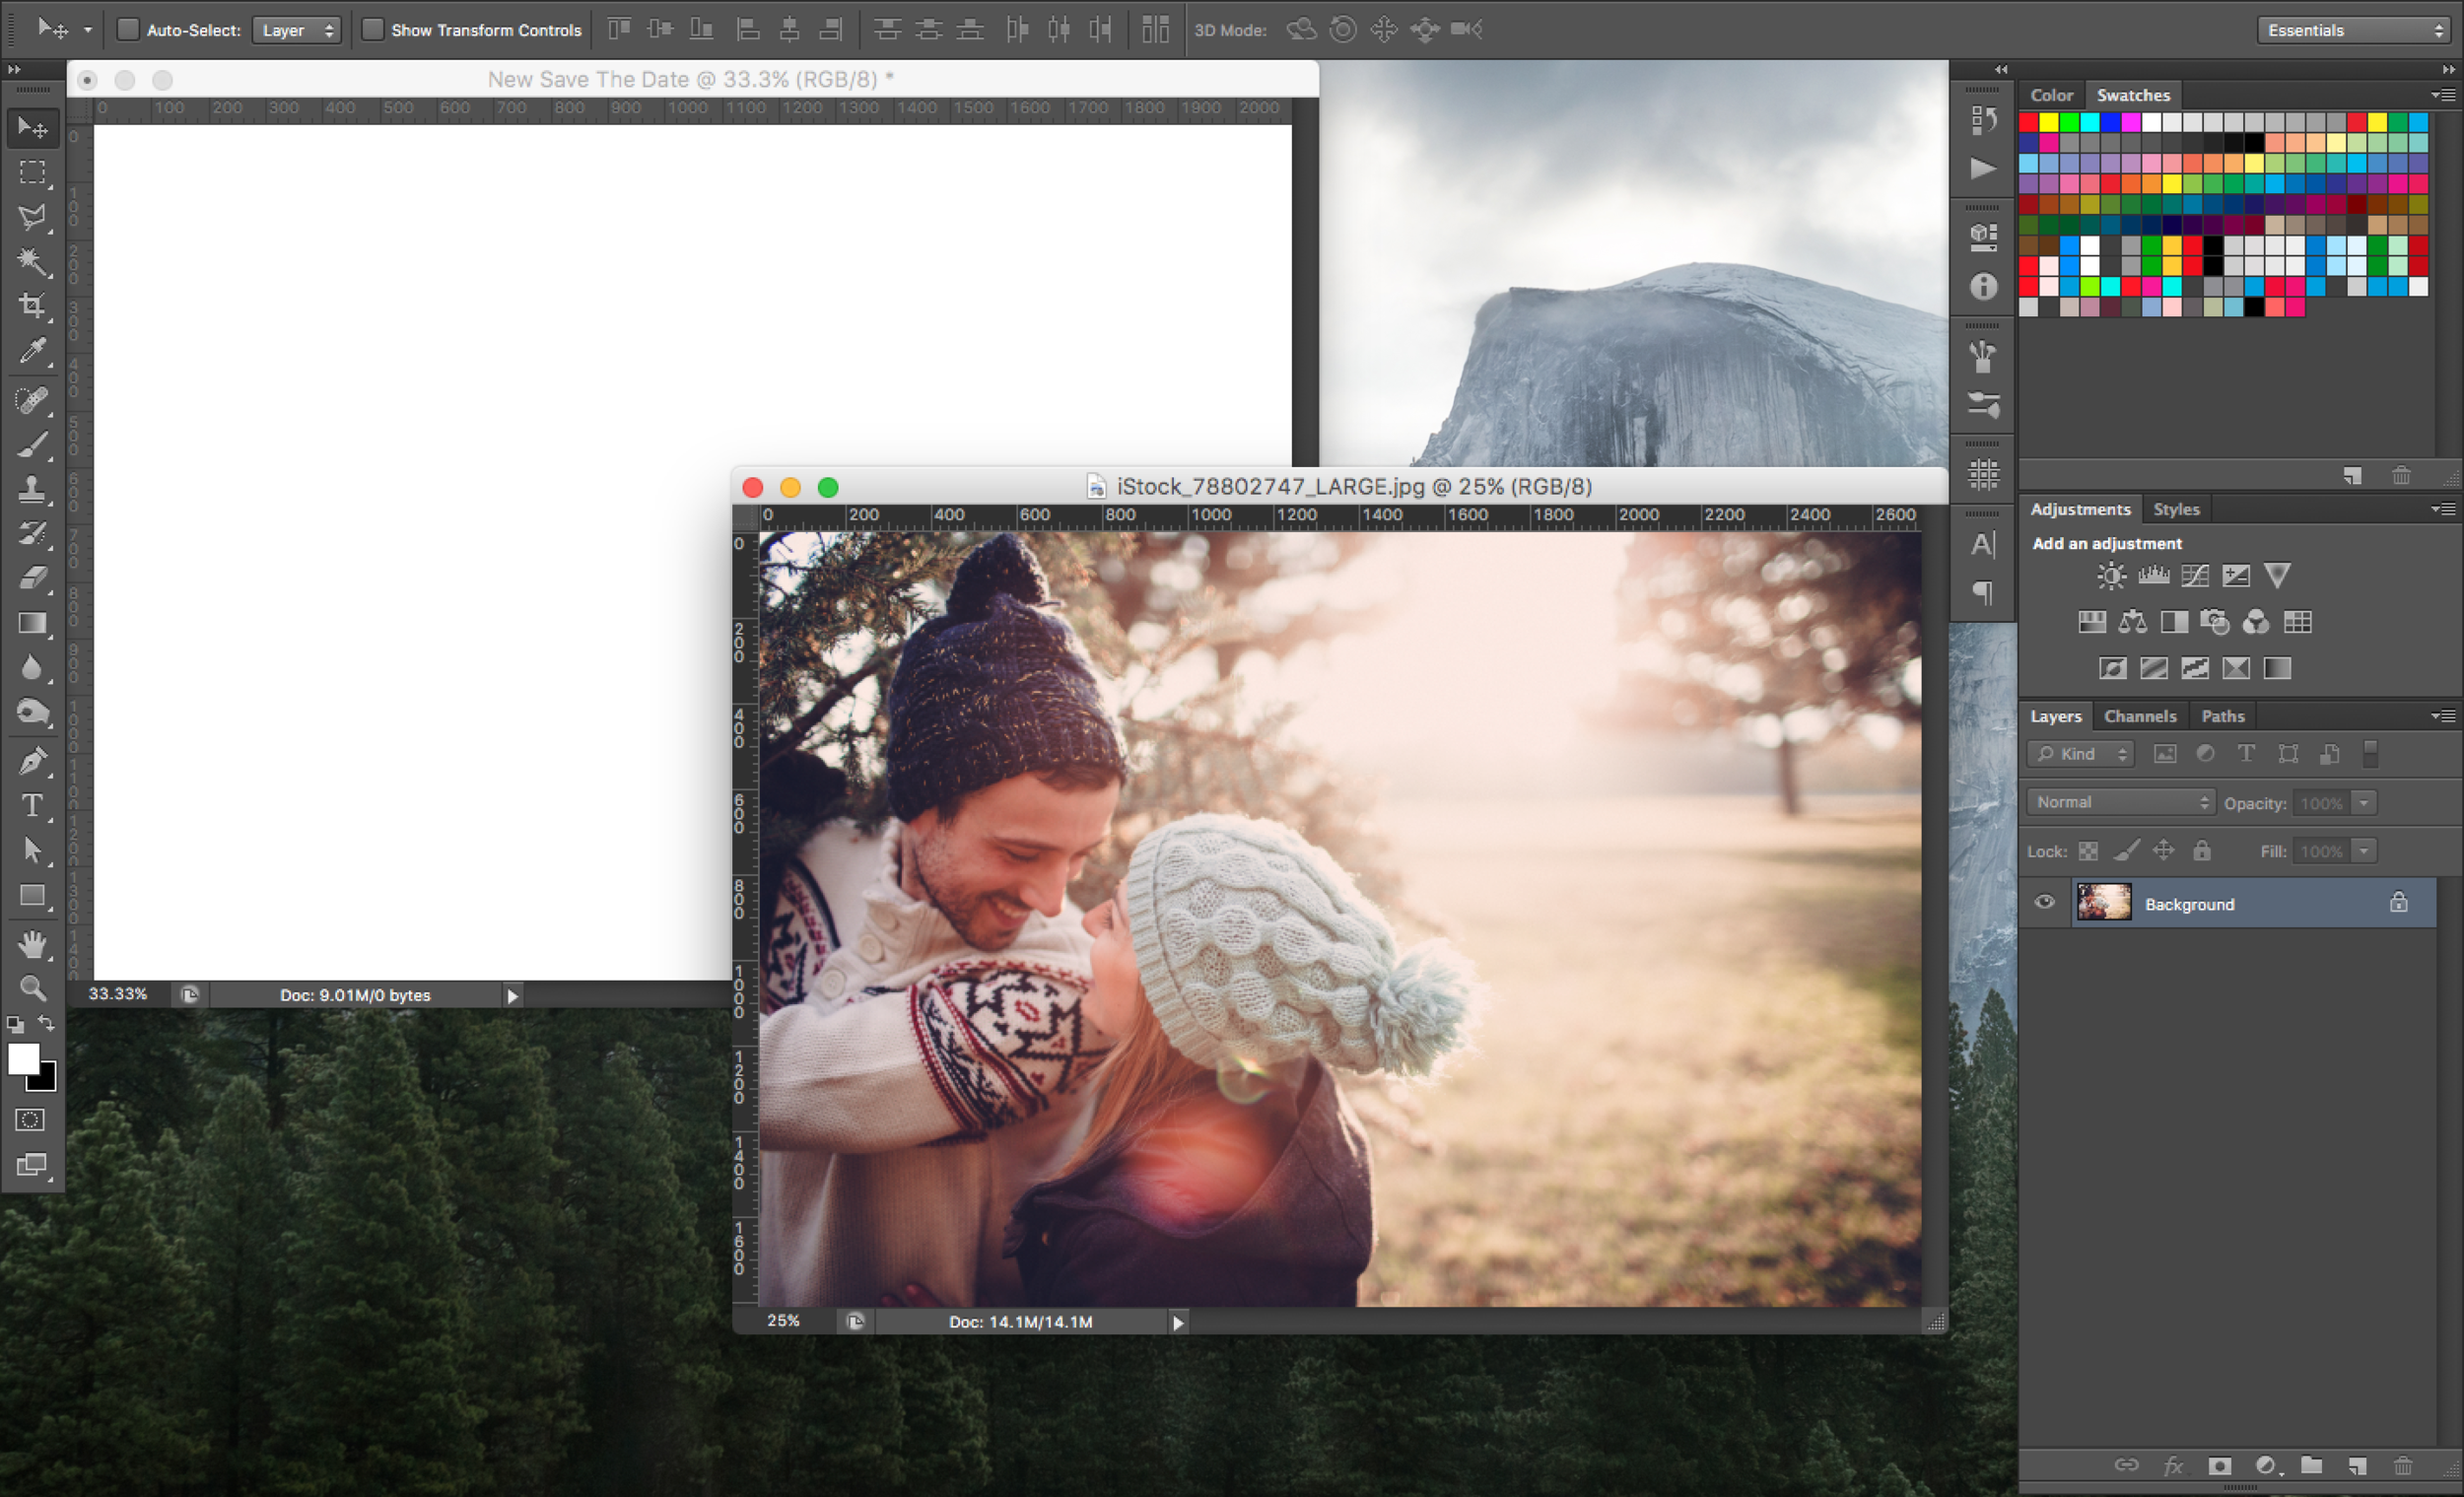
Step 2 - Adding Your Picture To The New Project: Open your photo. This might be the hardest part – Selecting the right picture for the "Save The Date". Yup, the picture that will reside on your friends and families refrigerators for months. Choose wisely. - Just kidding - Have fun, select your favorite, but make sure it's big enough, and open the picture in photoshop. Then, Drag the image over onto the 5x7 file.
Step 3 - Adding The Hand Lettered Type: Open the "Hand Illustrated Save The Date Overlays" folder and take a peek inside the PNG folder. Open the "Hand Lettered Type" folder and select one of the "Save The Date" images. Open the file in Photoshop and drag the hand-lettered type onto the 5x7. Adjust the placement of the picture and the type until you're in love with the layout.
Step 4 (optional) Changing the Color Of The Type: If you desire a different color of the "Save The Date" type, you can change it. To change the color of the "Save The Date" type, double-click on the layer and a dialog box will pop up. Select "Color Overlay" and choose the color by click on the color box. I decided to change the color of this type to white.
Step 5 - Adding A Hand Illustrated "Divider": Go back to the downloaded Hand Illustrated Save The Date Overlays folder and take a peek inside the "Dividers" folder. Once you found one you love, Open the file in Photoshop. Drag it over to the Save The Date. Once the Divider is on the new project, Transform the "Divider" to match the size of the "Save The Date" type, and place it beneath the type.
Let's also change the color to match the "Save The Date" type - Double click the layer and select "Color Overlay". I selected white to match.
Step 6 - Adding Your Names and Date: Using the text tool, adding a text layer and write in your names how you see fit. Create a second text layer for your date. This is all for your liking. Also, here's your chance to add a font that fits your style. I choose the typeface Sentinel - It's one of my favorites. Also, I like to have the names slightly bigger than the date.
Once you've written out your names and date, be sure to Center Align your "Save The Date", Divider, and text layers. See the below image to find the Center Align button - I'm hovering over the button.
Done! There ya have it. You're all done with your new Save The Date and ready for the print shop to do it's work. Save a .PSD and a .JPG for the print shop. Congratulations, you can now tell your friends and family you designed your own Save The Date.
For more information and to designer your own Save The Date cards, check out my 29 Hand Illustrated Save The Date Collection on Creative Market today!


